Guide to Properly Disinfecting Your Office

Whether you’re working from home or heading back to your office after a few months of safer-at-home measures, you’re likely quite concerned with keeping your workspace clean and disinfected. These are stressful times for all people, but with some foresight and proper disinfecting techniques, you can make sure that you and your co-workers are cutting down on the spread of COVID-19.

Here is a helpful guide on how to disinfect the office, from cleaning your desk to moving freely throughout the larger office without spreading germs. We’ll include smart disinfecting techniques as well as recommended products to use to keep your office safe.

Keep Yourself Safe with Masks and Disposable Gloves

Before tackling your office, you’ll want to properly protect yourself from the spread of germs. This means wearing a mask before entering your office, even if no other people are present. You’ll also want to invest in a supply of disposable gloves to wear while cleaning so that you can safely touch surfaces in common areas. Choose gloves in the proper size for your hands to avoid slippage, and make sure to wear disposable latex, vinyl or nitrile gloves that you can safely dispose of after cleaning. If you’re uncertain about choosing the right disposable gloves, check out our Disposable Gloves Size Chart & Buying Guide.

Disinfect Your Hands Throughout the Day

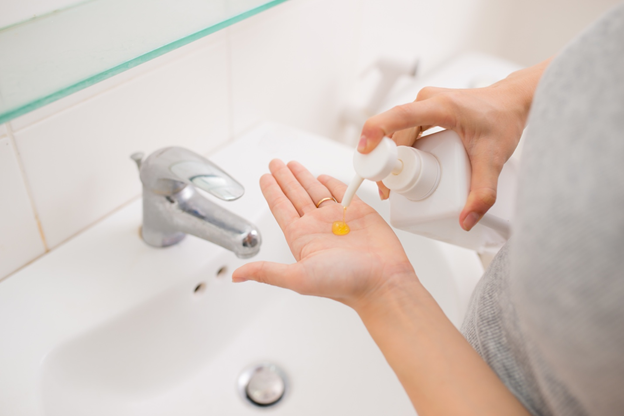
In addition to cleaning your office and wearing masks and gloves, you’ll also want to clean your own hands to cut down on the spread of germs. Each time you come into your office from outside, use the restroom, interact with a co-worker or touch a shared item or surface, simply wash your hands or clean them with a waterless hand sanitizer. Similar to disinfectant wipes, you’ll want to store a few bottles of hand sanitizer around the office in large containers to ensure that everyone is able to sanitize their hands as much as possible.

Cleaning Office Areas with Soap and Water

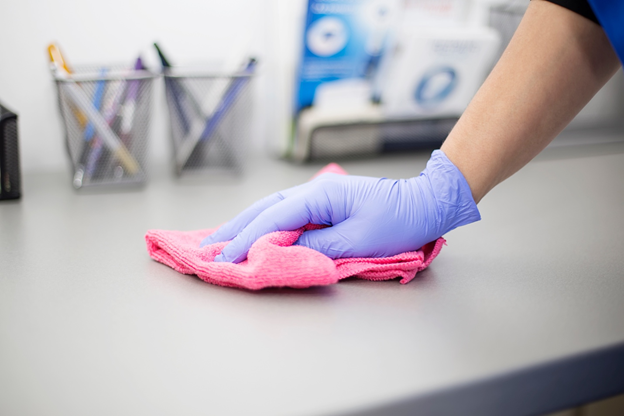
Before using heavy disinfectants, you’ll want to wash all surfaces (such as your desk, doors, walls and common areas, such as the kitchen) with soap and water. This removes dirt and impurities on the surfaces within your office, as well as reducing the number of germs that may exist there currently. Use a general, all-purpose cleaner in a bucket of warm water, then gently but thoroughly wipe surfaces with a clean rag.

Disinfect Surfaces with a Heavy-Duty Disinfectant

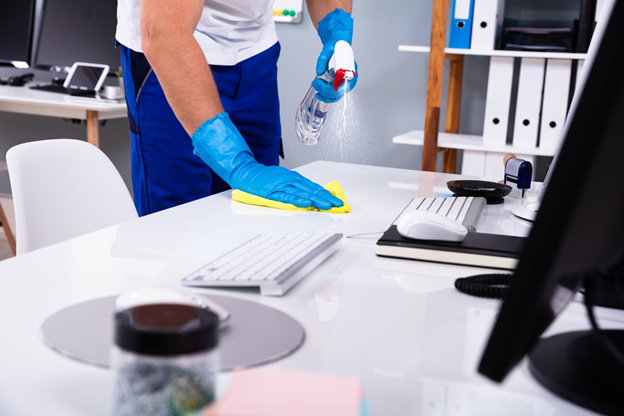
Next, once your office is clean and free of dirt and dust, go back through and disinfect all surfaces with a multi-purpose disinfectant, such as Clorox or Seventh Generation. This will kill all remaining germs now that the surface is clean.

Routinely Clean Frequently Touched Surfaces

Surfaces like your laptop keyboard, computer mouse and cell phone, plus common use items like doorknobs and bathroom faucets, should be routinely cleaned to ensure that you don’t pick up any germs or pass any to your co-workers. For this type of routine disinfecting, we recommend using multipurpose disinfectant wipes, which are easy to carry with you and use on a wide variety of surfaces. Simply display a few containers of disinfectant wipes throughout the office so that you can easily grab one each time you touch a doorknob or use the restroom. With these tips for how to disinfect office spaces in mind and posted around your workspace, you’ll help keep you and your team safe.

How to Prevent Streaking from a Mop

how-to-prevent-streaking-from-a-mop

Don’t you hate when you take the time and energy to mop your floors, only to end up with ugly white streaks? If you’ve ever wondered in how to prevent streaking from a mop, the Office Ink Blog is here to help!

You don’t need to invoke Martha Stewart black magic to prevent streaking from a mop. Giving your floors a streak-free shine boils down to three simple tricks:

  1. Sweep your floor first, then
  2. use the right floor cleaner
  3. in the right amount.

Sweep first to prevent streaking when you mop.

You absolutely must sweep, or even better, vacuum, your floor before mopping to prevent streaking. Otherwise, you’re just going to smear debris around and end up with a streaky mess.

Use the right cleaner to prevent streaking from a mop.

You have to use the right floor cleaner for the type of floor you have to prevent streaking from a mop. I’ve put together a handy little chart below, and included some DIY alternatives you can use in a pinch.

Floor
Method
Recommended 
Laminate Floors Buy: ammonia-free floor cleaner Swiffer® WetJet® Cleaning Solutions
DIY: 2 tbs. of baby soap per gallon of water
Wood Floors Buy: neutral, water-based cleaner for wood floors. Murphy® Oil Soap
DIY: one part vinegar and one part oil
Brick / Concrete Floors Buy: mild, neutral floor cleaner PAK-IT® Neutral Floor Cleaner
DIY: 2 tbs. dish soap per gallon 
Ceramic Floor Tiles Buy: ammonia-based floor cleanerDIY: 2 tbs. laundry detergent per gallon Mr. Clean® Finished Floor Cleaner

Using just a little floor cleaner prevents streaking from a mop.

You can’t prevent streaking when you mop if you use the wrong cleaning solution, or use the wrong amount. For example, ammonia based cleaners will dull the the finish of wood and laminate flooring. And too much soap will leave a residue on all floors. You also need to be smart about the amount of water you use. Leaving too much water on mopped floors slows drying times and results in streaky deposits. Plus, water warps wood flooring. Go ahead and dry your wood floors with a soft cloth after you mop.

Finally, be sure to read the instructions before you apply any cleaner to your floors.  When in doubt, just use  use a mix of white vinegar and plain water. The vinegar provides a little cleaning power, and neutralizes the alkaline in water to eliminate white spots. And while vinegar and water won’t give the best clean on all floor types, it won’t hurt either.

Sources: WikiHow, Real Simple

How to remove adhesive from metal, plastic, glass, and clothes.

UPDATE 6/22/2018: Since first publishing this article in 2013, we have received LOTS of great suggestions from our customers about what works and what doesn’t. Thank you! So, we have incorporated your feedback into a new and improved guide about removing adhesive residue.

Click here to read our updated article on this topic and take the hassle out of removing stickers, labels, tape from various surfaces at work and in your home!

how-to-remove-adhesive-from-metal-plastic-glass-and-clothes

Removing the sticky, adhesive residue left by stickers and tape can be a pain. Sometimes, scraping the adhesive off with your finger nail just doesn’t do the trick. Office Ink shows you how to remove adhesive residue from metal, plastic, vinyl and clothes.

How to remove adhesive from metal

To remove adhesive from metal, try using rubbing alcohol. Really, we should just go ahead and declare good old isopropyl the hardest working man in your medicine cabinet.  In addition to removing removing adhesive from metal, alcohol removes cleans hands, removes dry erase marker stains and even revives dried out pens. To remove adhesive from metal, just rub the stain with a cotton ball soaked in alcohol.

Bonus tip: You can also use baby oil or rubbing alcohol to remove adhesive from metal.

How to remove adhesive from plastic and vinyl.

So the object in warm, soapy dishwater, then wipe the adhesive stain away with a soft cloth and vinegar.

How to remove adhesive from glass

To remove adhesive from glass, you need to break out the big guns. Try acetone nail polish remover first. FYI:  glass is one of the few office & household surfaces acetone won’t damage. So don’t try it on anything else.

Rubbing acetone on the stain will probably do the trick. But if doesn’t try WD-40 next. Lubricant will break down the adhesive and is easy to wash off glass.

How to remove adhesive from clothes

There are a few methods you can try to remove adhesive from clothes. First, pre-soak your garment in hot water with a stain remover, then launder as usual. If your stain remains try spot cleaning with:

  • One tablespoon of  laundry detergent mixed with two cups of warm water water.
  • One tablespoon of ammonia mixed with two cups hot water.

If neither solution removes your adhesive stain, fold your garment in half so the stain faces inward, with a wet paper towel between the two layers. Let that sit for an hour, then spot clean the adhesive stain with a soft cloth and an alcohol based hand sanitizer like Purell.

Got a can’t-miss stain removing tip? We’d love to hear it! Post your suggestions in the comments.

Sources: TLC How Stuff Works, Good Housekeeping, Discovery How Stuff Works

How to Clean a Laptop Screen

how-to-clean-laptop-screen-blog Laptop screen covered in dust and finger prints? We have some tips on how to clean a laptop screen. First things first: don’t use ammonia-based glass cleaners such as Windex to clean your laptop screen. Ammonia can damage modern LCD screens. Your best bet is to use wet wipes specifically formulated for use on computer screens. The advantage of
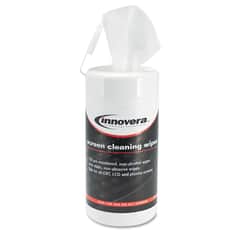
 laptop screen cleaning wipes is the wipe material, specially fabricated to not scratch your screen. Plus, the cleaning solution is great for quickly cleaning fingerprint. If you don’t have any screen cleaning wipes on hand, just use a soft cloth moistened with plain water.

Recommended Laptop Screen Cleaning Wipes:

Innovera® Antistatic Screen Cleaning Wipes Read Right® Kleen & Dry™ Wet/Dry Wipes  3M Notebook Screen Cleaning Wipes 
Innovera® Antistatic Screen Cleaning Wipes Read Right® Kleen & Dry™ Wet/Dry Wipes 3M Notebook Screen Cleaning Wipes

Once you’ve cleaned your laptop screen, you may as well deal with the keyboard. Use compressed air (or hey, a Post-it note) to get rid of dust and debris under the keys. Then wipe the keyboard down with the same cloth or wipe you used on the screen.

Got some advice on how to clean a laptop screen? We’d love to hear them! Leave your tips in the comments.

How to make a presentation binder

how-to-make-a-presentation-binder

You’ve done your homework and are ready to wow at your presentation. But how to make your presentation binder as awesome as you are? The same qualities that make for great presentations make for great presentation binders: make them engaging, informative and sensibly organized. Not sure where to start? We’ve got some great tips on how to put your presentation binder together.   Continue reading

How to choose a file cabinet: Smart Office shows you how.

Maybe you’re tired of stacking the important files in your home office in piles on your desk, or worse yet, your floor. Or perhaps the file cabinets in your office are aging as gracefully as Ms. Havisham. You nearly dislocate your shoulder every time you yank one file drawer open, and can’t remember the last time any of them closed completely. In other words, it’s time to buy a filing cabinet.Now that you’re ready to properly store, organize and protect your office files and documents, don’t whip out the company credit card just yet. There a few important considerations to make before you buy. How much room do you have in your office? How many files does the cabinet need to hold? How long do you need your file cabinet to last? If you like making significant office furniture purchases only once, slow down and pay attention. Smart Office is going to show you how to choose a filing cabinet.
First decide whether your office needs a vertical or lateral file cabinet. Vertical file cabinets are the most traditional, and offer between two and five drawers. Files run front to back in vertical file cabinets and face the user. Vertical file cabinets are nice because they take up little wall space, but aren’t the best office file cabinet if you need to access your files every day, or don’t have much walk around room. Your office needs to be able accomadate the depth of vertical file cabinets, usually around 29 inches, plus the length of the open drawer, another 29 inches. If the the area you keep your office files in is crammed already, vertical file cabinets aren’t the way to go.
Lateral file cabinets take up more wall space, but less interior space than vertical file cabinets. That’s because lateral file drawers are usually only about 20 inches deep, so require less room to open. Lateral files are great for high volume offices that need to access files several times a day, and for crowded work areas. Lateral file cabinets are also extremely versatile. You can arrange your files so they face the sides of  the file drawers and run left to right, or face your files toward the front of the cabinet to create organized rows of files. Many two-drawer lateral file cabinets are small enough to fit under your desk, supplying a great way to expand the storage capacity of small offices. Or place a lateral file cabinet against your desk to create a new work surface.
Once you’ve settled on the type of file cabinet your want, check out how the cabinets are put together. File cabinets come in two varieties: metal file cabinets and wood file cabinets. Metal is the most popular choice for file cabinets because it can handle heavy use and still look good. Metal file cabinets are the best choice for busy offices that need to access files often. Plus, these days you have a lot more color options that drab olives and khaki. For example, you can get great heavy duty metal file cabinets from HON and Safco in colors like black, gray and putty. Ok, metal file cabinets are will never be the flashy office show pieces, but they do offer a long term storage and protection for your office files and documents. Just make sure you choose a file cabinet with a protective coating to prevent rust. If you want to bring the beauty of wood furniture to your office, be aware that wood file cabinets are less resilient that metal cabinets. They work best and last the longest in home and small offices. The sturdiest metal and wood file cabinets are designed with double–walled steel sides.
Your new file cabinet should be as safe as it is sturdy. Shoddily constructed file cabinets can tip over on users, causing injury or death. Choosing a file cabinet with a few key safety features is worth the investment. Look for file cabinets with an anti-tip mechanism, such as  interlocking drawers that prevent your file cabinet from tipping over when multiple drawers are open. File cabinets designed with ball bearing suspension systems, and other strong drawer suspension systems, open and close smoothly even when fully loaded  to prevent frustration and injury. Fire and impact resistant file cabinets are also available for offices that need the extra protection. Look for file cabinets with the Underwriters’ Labratory Class 350 rating. UL Class 350 rated file cabinets will maintain an interior temperature of 350 degrees in fires of up to 1700 degrees for one hour. They can also withstand the impact of a 30-foot drop. However, a Class 350 rated file cabinets costs hundreds of dollars more than standard file cabinets, so you might just want to get an office safe if you’re concerned about fires.

Cabinet style, construction and safety are the most important considerations while shopping for a file cabinet, but these days, there are a range of other features available. If you regularly transport a large number of files, consider a mobile file cart. Most offices file storage needs expand over time. If you select your file cabinet from a furniture collection, you can always get a matching cabinet if you need to, as well as complimentary hutches, bookcases and other storage and display options.

If you’ve got more questions on choosing an office file cabinet, or office furniture in general, fell free to call on the experts at On Time Supplies. They can be reach toll free at 1-866-501-6055, or via the live chat feature at OnTimeSupplies.com